_

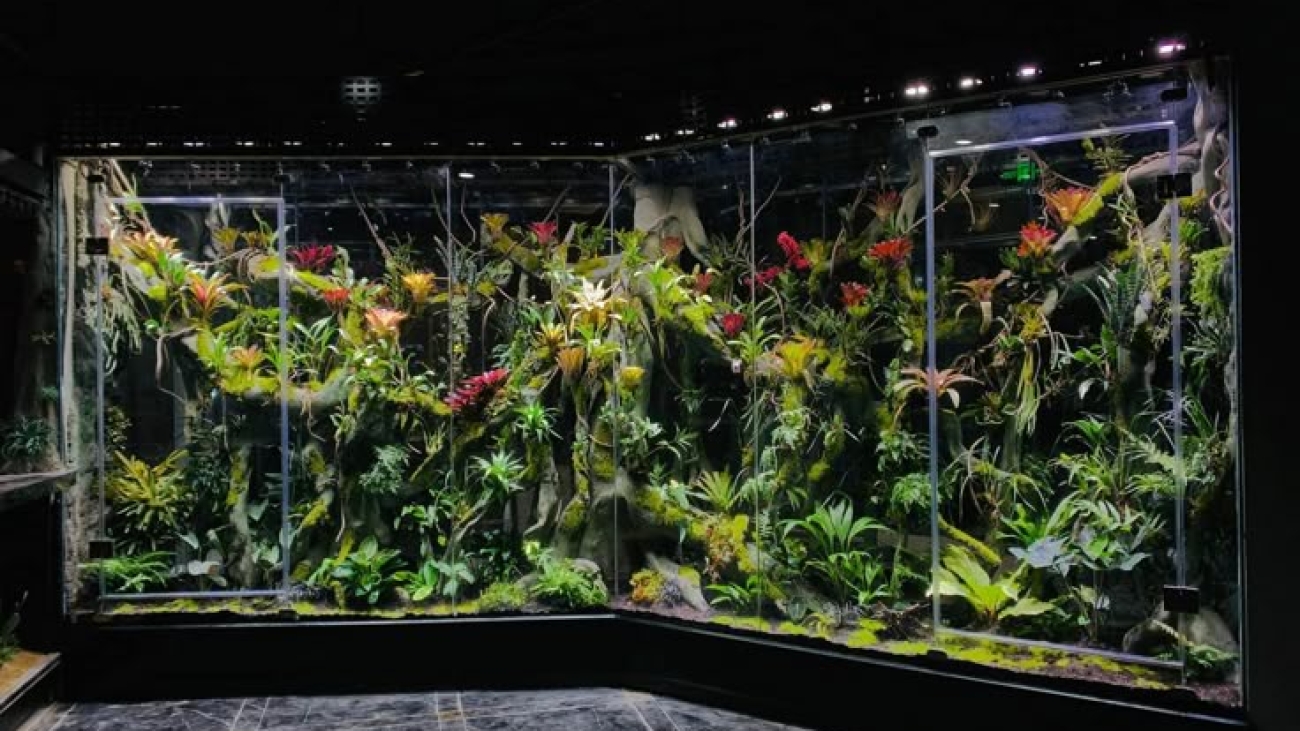
🌿 The Ultimate Vivarium Guide

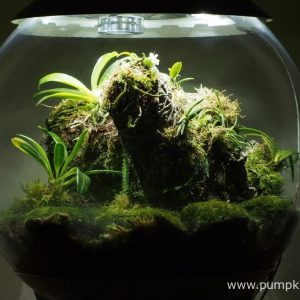
A vivarium is a self-contained habitat that replicates natural ecosystems in a tank, terrarium, or container. Unlike aquariums, vivariums focus primarily on land or semi-aquatic environments, supporting plants, amphibians, reptiles, and small invertebrates. This guide covers everything you need to create a thriving vivarium.


🪨 Step-by-Step Setup Guide

1. Choose the Container

Select a tall or wide glass or acrylic tank depending on species and plant choices. Tall tanks are ideal for climbing species and vertical planting, while wide tanks are great for ground-dwelling plants and amphibians.

2. Plan the Layout

  • Decide on the purpose: forest, desert, or tropical rainforest simulation.
  • Sketch your layout for substrate layers, plants, hiding spots, and climbing structures.
  • Include caves, logs, and driftwood for animal enrichment.
  • Leave open areas for easy maintenance and observation.
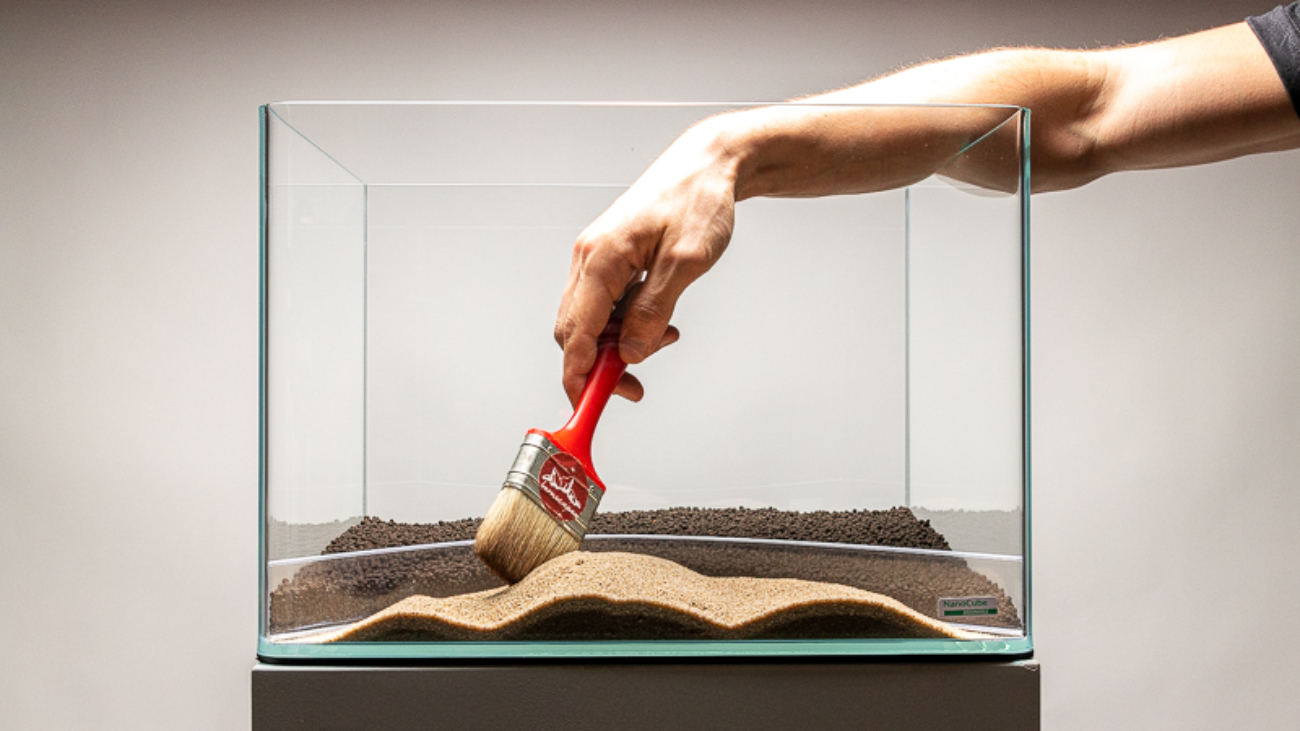
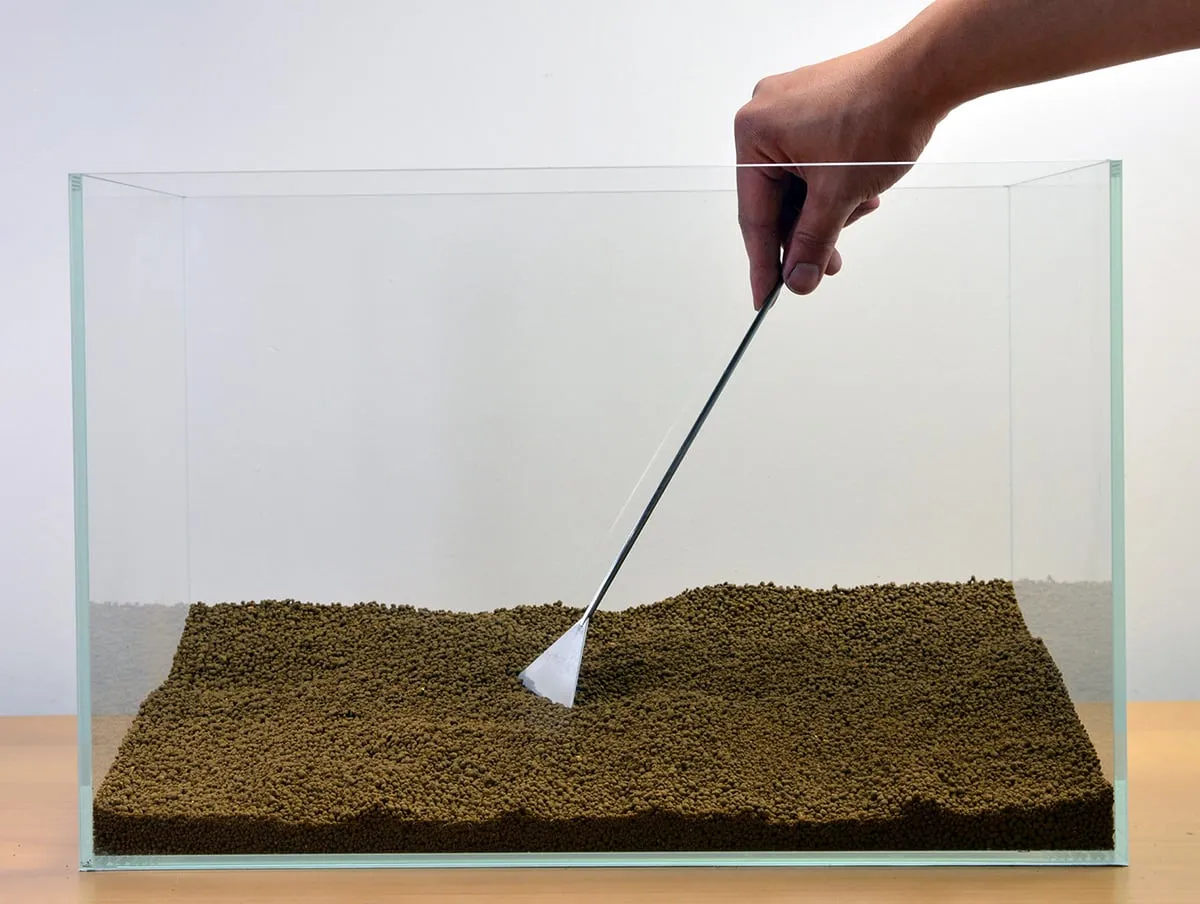
3. Substrate

  • Bottom Drainage Layer: Small pebbles or LECA balls for excess water drainage.
  • Barrier Layer: Mesh or landscape fabric to separate drainage from soil.
  • Planting Layer: Nutrient-rich soil, coco fiber, or potting soil.
  • Top Layer: Moss, leaf litter, or sand depending on your theme.

4. Install Equipment

  • Lighting: Full-spectrum LEDs for plant growth and animal health. Provide 10–12 hours/day.
  • Heating: Heat mats or bulbs if species require specific temperature ranges (22–28°C / 72–82°F).
  • Humidity Monitor: Hygrometer to track humidity levels, typically 60–90% for tropical setups.
  • Water Features: Small waterfalls, shallow pools, or drip systems for humidity and drinking sources.

5. Planting

  • Foreground Plants: Mosses, ferns, small ground-cover plants.
  • Midground Plants: Bromeliads, ferns, pothos, small shrubs.
  • Background / Climbing Plants: Vines, epiphytes, larger ferns.
  • Attach epiphytes to wood or rocks for a natural appearance.
  • Ensure plant species match the vivarium’s humidity and light requirements.

6. Introduce Animals

  • Begin with hardy, low-maintenance species: dart frogs, tree frogs, small reptiles like anoles, or invertebrates like springtails and isopods.
  • Introduce animals gradually to avoid stress and allow them to acclimate.
  • Ensure all species are compatible with each other and the plant layout.
  • Provide hiding spots, climbing areas, and shallow water dishes for drinking.

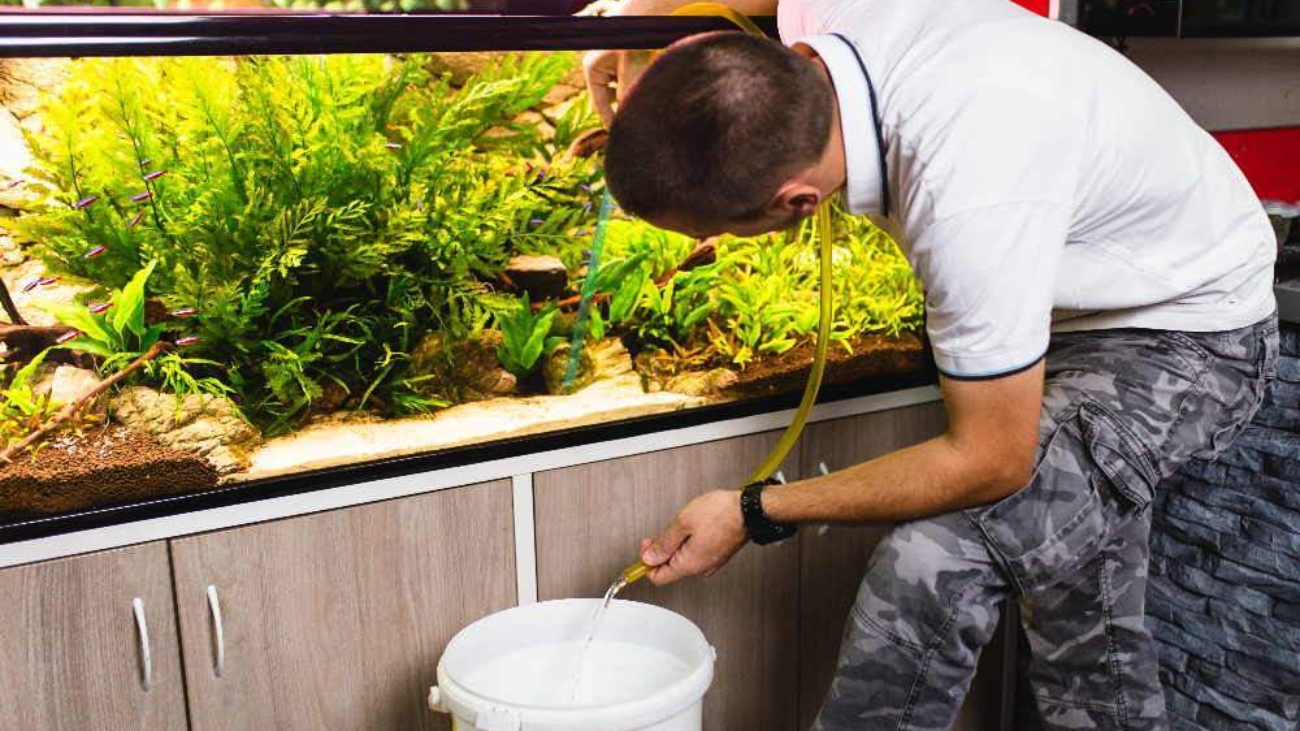
7. Maintain Water and Humidity

  • Mist plants and land surfaces daily or use an automated misting system.
  • Maintain humidity appropriate for your species: 60–90% for tropical, 40–50% for temperate species.
  • Check and clean shallow water areas to prevent bacterial growth.

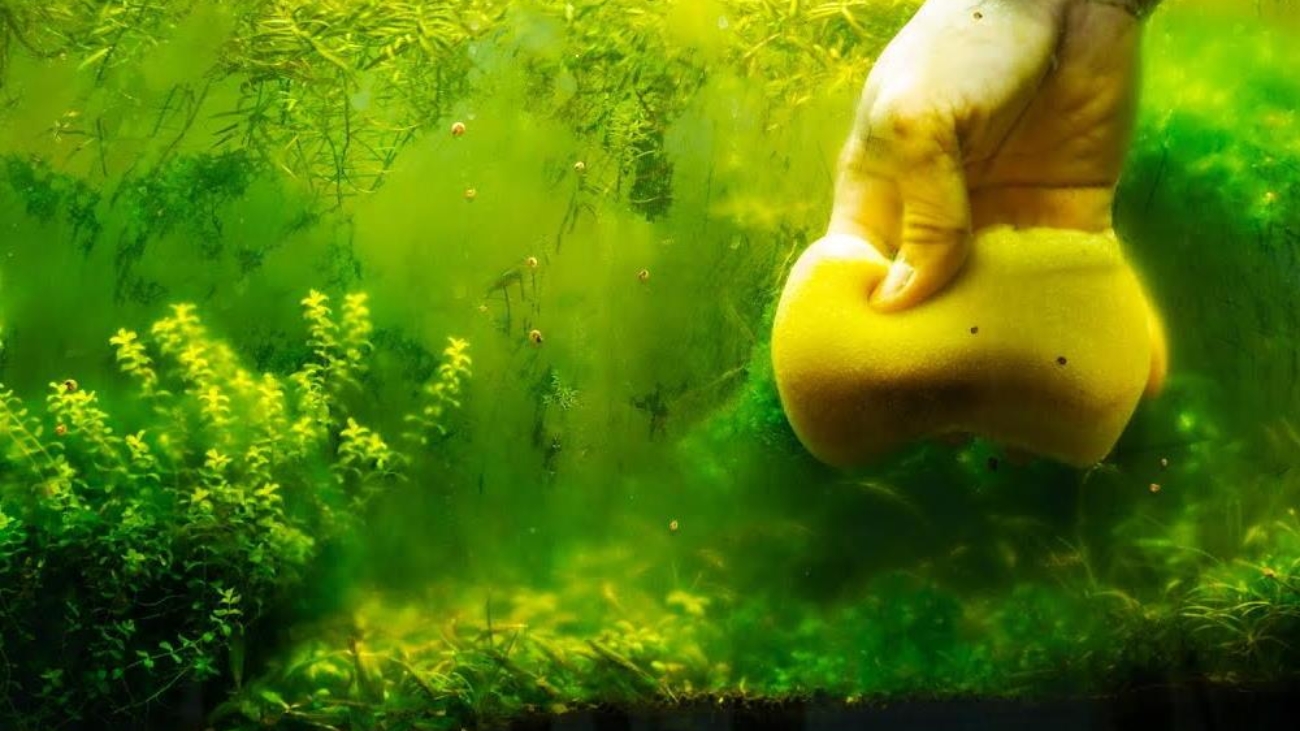
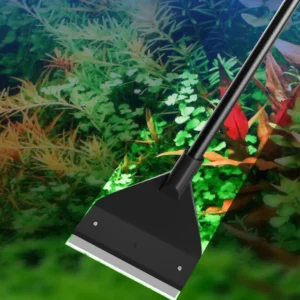
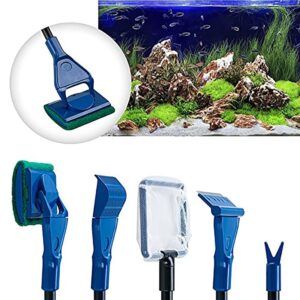
8. Regular Maintenance

  • Trim plants regularly to prevent overgrowth.
  • Remove dead leaves or decaying matter promptly.
  • Monitor temperature and humidity daily.
  • Observe animal behavior for signs of stress, illness, or improper environment.
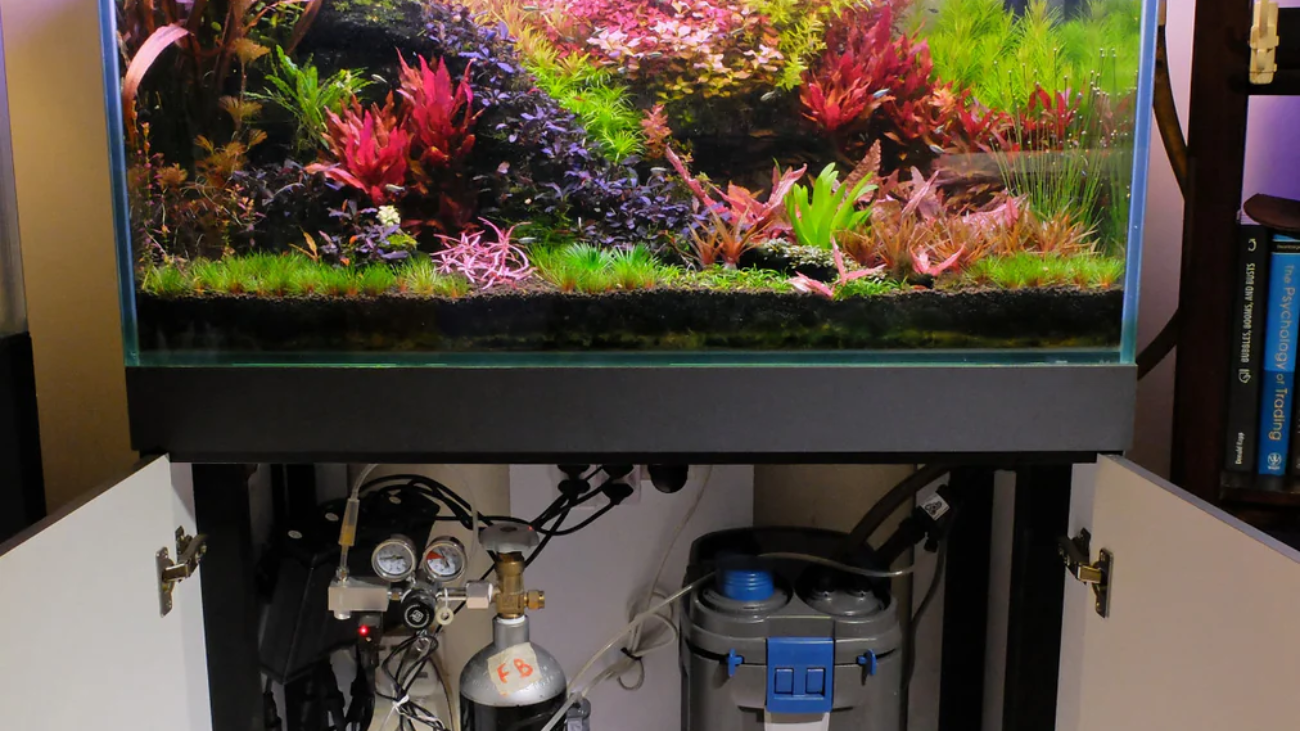
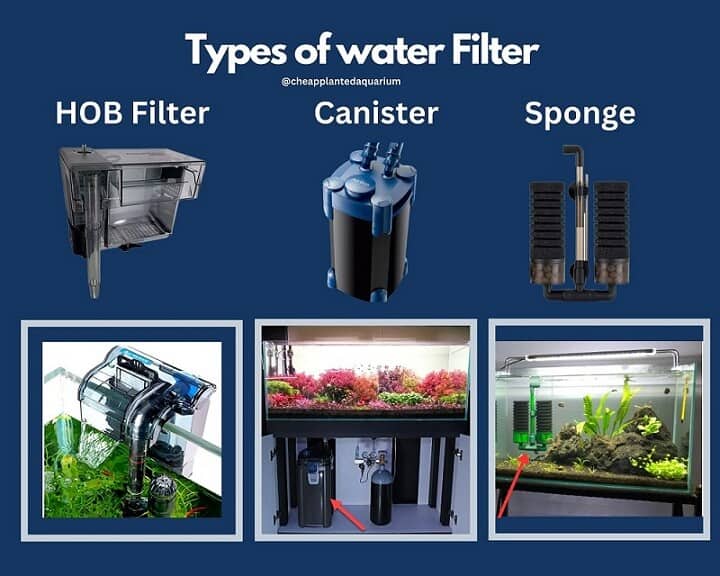
  • Replace or clean filter media if using aquatic or semi-aquatic systems.

🌿 Recommended Plants

  • Ferns (Nephrolepis, Microsorum)
  • Mosses (Java moss, Sheet moss, Cushion moss)
  • Bromeliads (Neoregelia, Guzmania)
  • Pothos (Epipremnum aureum)
  • Fittonia (nerve plants), Peperomia, small vines

🐸 & 🐍 Suitable Animals

  • Small frogs: Dart frogs, Tree frogs, Pacman frogs (species-specific)
  • Reptiles: Anoles, small geckos, small skinks
  • Invertebrates: Springtails, isopods, small snails

⚠️ Common Beginner Mistakes

  • Overwatering or under-watering plants and soil.
  • Adding too many animals too soon.
  • Choosing plants or animals that are incompatible with humidity or temperature levels.
  • Neglecting cleaning water dishes or shallow pools.
  • Poor ventilation leading to mold or fungus growth.

✅ Summary

A vivarium is a miniature terrestrial ecosystem that combines plants, soil, and animals in a controlled environment. With careful planning of layout, substrate, lighting, humidity, and animal selection, you can create a thriving, beautiful, and educational setup. Start slowly, monitor your parameters, and enjoy watching your vivarium grow and evolve over time!

Join Our WhatsApp Group for Vivarium Tips & Inspiration

7070

🌿 The Ultimate Paludarium Guide

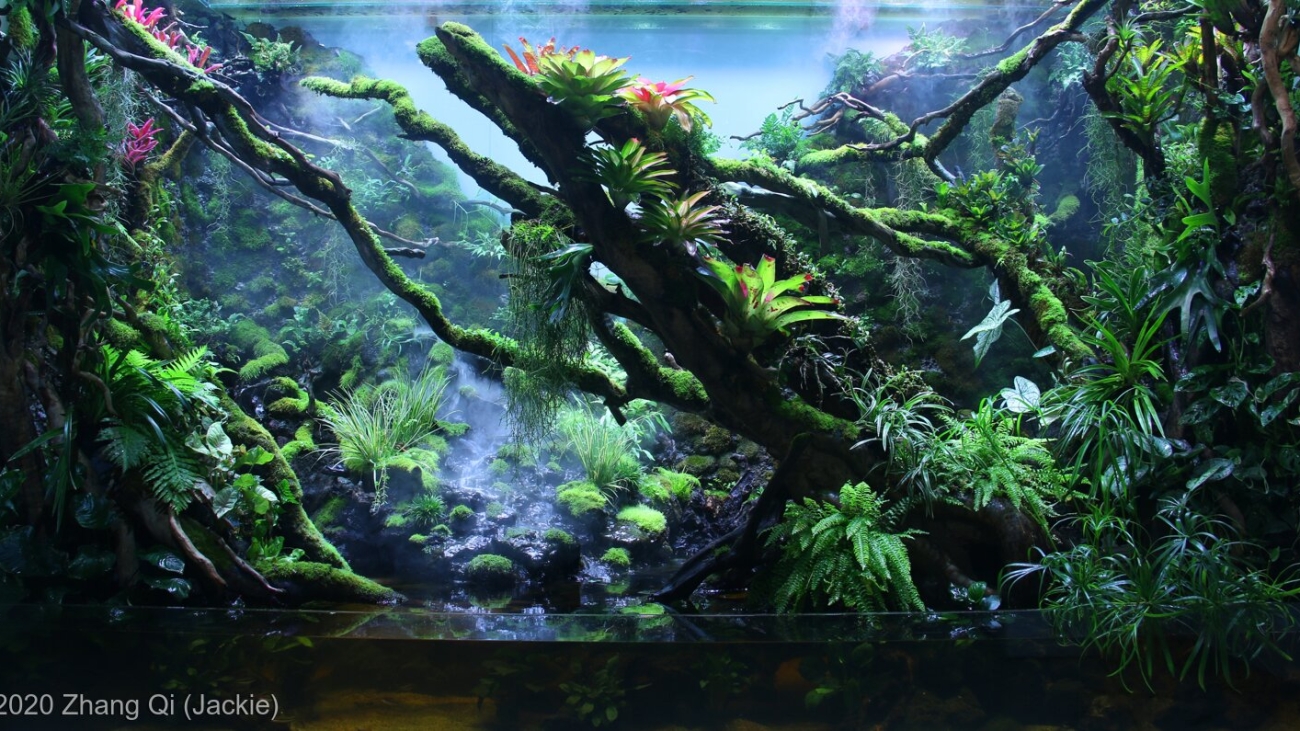
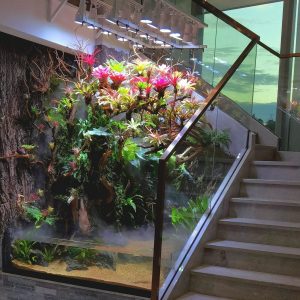
A paludarium is a hybrid ecosystem that combines a terrestrial and aquatic habitat in one container. Unlike standard aquariums or terrariums, paludariums allow you to grow plants above and below water and house both land and aquatic animals. This guide will take you through everything you need to know to create a thriving freshwater paludarium.


🪨 Step-by-Step Setup Guide

1. Choose Your Paludarium Container

Select a tall, sturdy glass or acrylic tank. Height is more important than width, as vertical space allows for land elevation and waterfalls. The tank should hold both a water section and a land section.

2. Plan the Layout

  • Decide the ratio of water to land. Common setups: 60% water / 40% land or 50/50.
  • Sketch the layout to determine where plants, rocks, and wood will go.
  • Include elevated land areas using rocks, foam, or driftwood.
  • Design waterfalls or streams if desired for humidity and circulation.

3. Substrate and Hardscape

  • Aquatic Substrate: Sand or fine gravel. Root tabs can supplement nutrients for aquatic plants.
  • Land Substrate: Nutrient-rich soil (coco fiber, potting soil) capped with sphagnum moss to prevent soil wash into water.
  • Hardscape: Use rocks, driftwood, or cork bark to create elevation, hiding spots, and climbing surfaces.

4. Install Equipment

  • Filter: Canister or sponge filter to maintain clean water.
  • Heater: Keep water at species-appropriate tropical temperature (24–28°C / 75–82°F).
  • Lighting: Full-spectrum LED lights for both aquatic and terrestrial plants.
  • Water Pump / Waterfall: Optional but improves circulation, oxygenation, and humidity.
  • Humidity Gauge: Monitor humidity for terrestrial plants and amphibians (60–90%).

5. Prepare the Water

  • Fill the aquatic section with dechlorinated water or aged tap water.
  • Check water parameters: pH (6.5–7.5), ammonia 0 ppm, nitrite 0 ppm, nitrate < 20 ppm.
  • Target water hardness suitable for fish and plants: GH 4–12, KH 3–8.
  • Check water temperature and adjust heater accordingly.
  • Optional: Add beneficial bacteria to accelerate cycling.

6. Planting the Paludarium

  • Terrestrial Plants: Ferns, mosses, bromeliads, pothos, epiphytic orchids.
  • Aquatic Plants: Java fern, Anubias, Amazon sword, Cryptocoryne, Java moss.
  • Arrange taller plants at the back and creeping plants in the foreground.
  • Use rocks and wood to attach epiphytes and create climbing surfaces.
  • Maintain a balance: aquatic plants in water and semi-aquatic plants at the waterline.

7. Cycle the Ecosystem

  • Run the water section for 4–6 weeks before adding fish to establish beneficial bacteria.
  • Regularly test ammonia, nitrite, and nitrate levels during cycling.
  • Partial water changes (10–20%) may be needed to stabilize parameters.

8. Adding Animals

  • Start with hardy aquatic animals: guppies, small tetras, shrimp, or snails.
  • Land/semiterrestrial animals: small frogs, tree frogs, or dart frogs (ensure proper humidity and safety).
  • Add animals slowly to avoid ammonia spikes and stress.
  • Ensure animals are compatible with each other and the environment.

9. Maintenance

  • Trim plants regularly and remove dead leaves.
  • Monitor water parameters weekly: pH, GH, KH, ammonia, nitrite, nitrate.
  • Perform partial water changes every 1–2 weeks.
  • Clean filter media without using tap water (use tank water).
  • Maintain high humidity (60–90%) for terrestrial plants and amphibians.
  • Observe animals daily for health and activity levels.

🌿 Popular Plants for Freshwater Paludariums

  • Terrestrial: Ferns, Pothos, Moss, Bromeliads, Fittonia, Peperomia
  • Aquatic: Java Fern, Anubias, Cryptocoryne, Amazon Sword, Java Moss, Bacopa
  • Epiphytes: Orchids, Tillandsia, small ferns attached to wood or rocks

🐟 & 🐸 Suitable Animals

  • Fish: Guppies, Rasboras, Neon Tetras, Endler’s Livebearers
  • Shrimp & Snails: Cherry Shrimp, Amano Shrimp, Nerite Snails
  • Amphibians: Dart frogs, tree frogs, small newts (species must match environment)

⚠️ Common Beginner Mistakes

  • Adding animals before the water is fully cycled.
  • Overcrowding the tank, causing stress and water quality issues.
  • Choosing incompatible plant or animal species.
  • Neglecting humidity, causing terrestrial plants to dry out.
  • Ignoring lighting or nutrient needs, leading to slow growth or algae problems.

✅ Summary

A freshwater paludarium is a fascinating way to combine land and water habitats in one ecosystem. By carefully planning your layout, substrate, plants, animals, and maintenance schedule, you can create a self-sustaining miniature rainforest. Start slowly, monitor your water and land parameters, and enjoy watching your ecosystem flourish!

Join Our WhatsApp Group for Paludarium Tips & Inspiration

OASE-Competition-image-scaled

🌿 Ultimate Guide to Terrariums: Create Your Own Miniature Ecosystem

Terrariums are miniature gardens enclosed in glass. They combine art, design, and nature to bring a touch of greenery into your home or office. Ideal for beginners or plant enthusiasts seeking a low-maintenance project.

🪴 What is a Terrarium?

A terrarium is a sealed or open container with soil, plants, and sometimes small decorative items. They can be closed (creating a humid, self-sustaining environment) or open (ideal for dry plants like succulents or cacti).

🌱 Benefits of Terrariums

  • Bring nature indoors with minimal space.
  • Improve air quality by adding live plants.
  • Low-maintenance compared to traditional houseplants.
  • Fun DIY project for beginners or children.
  • Can be customized with stones, figurines, and decorative elements.

🪨 Step-by-Step Setup Guide

1. Choose Your Container

Select a clear glass container: a jar, bowl, vase, or terrarium-specific container. Closed containers work for moisture-loving plants; open containers are best for succulents and cacti.

2. Prepare the Base

  • Drainage Layer: Add 1–2 inches of small pebbles or gravel to prevent waterlogging.
  • Activated Charcoal: Helps reduce odors and keeps water clean, especially for closed terrariums.
  • Soil Layer: Use potting soil suitable for your plant type. Succulents need sandy soil; tropical plants need moisture-retentive soil.

3. Plant Your Terrarium

  • Choose small plants that fit your container.
  • Remove excess soil from roots and plant carefully to avoid overcrowding.
  • Arrange plants with taller ones in the back and shorter in the front for visual depth.
  • Optional: Add moss, figurines, or decorative stones for aesthetics.

4. Watering & Humidity

  • Closed terrariums need minimal water; mist lightly if condensation disappears.
  • Open terrariums require more frequent watering depending on plant type.
  • Check soil moisture by touching the top layer—never let soil sit in standing water.

5. Lighting

  • Place terrariums in bright, indirect sunlight. Avoid direct sunlight to prevent overheating.
  • Artificial LED grow lights work well for indoor setups with low natural light.

6. Maintenance Tips

  • Trim dead leaves to prevent mold.
  • Monitor condensation in closed terrariums and adjust ventilation if needed.
  • Clean glass regularly for a clear view of your miniature garden.
  • Fertilize sparingly—terrarium plants usually need very little nutrients.

🌸 Popular Plants for Terrariums

  • Tropical Terrariums: Fittonia, Pilea, Ferns, Peperomia.
  • Succulent/Cactus Terrariums: Echeveria, Haworthia, Jade, Sedum.
  • Moss Terrariums: Sheet moss, Cushion moss, Mood moss.

🌟 Creative Ideas

  • Miniature fairy gardens with figurines and tiny furniture.
  • Use colored sand, shells, or crystals for decoration.
  • Create themed terrariums for seasons or holidays.

✅ Summary

Terrariums are a simple, creative way to bring nature indoors. With careful planning, the right container, and proper plant selection, you can enjoy a miniature garden that’s both decorative and low-maintenance. Start small, experiment, and watch your mini ecosystem thrive!

Join Our WhatsApp Group for Tips & Inspiration

reef-aquarium

🐠 Saltwater Aquariums & 🪸 Reef Tanks


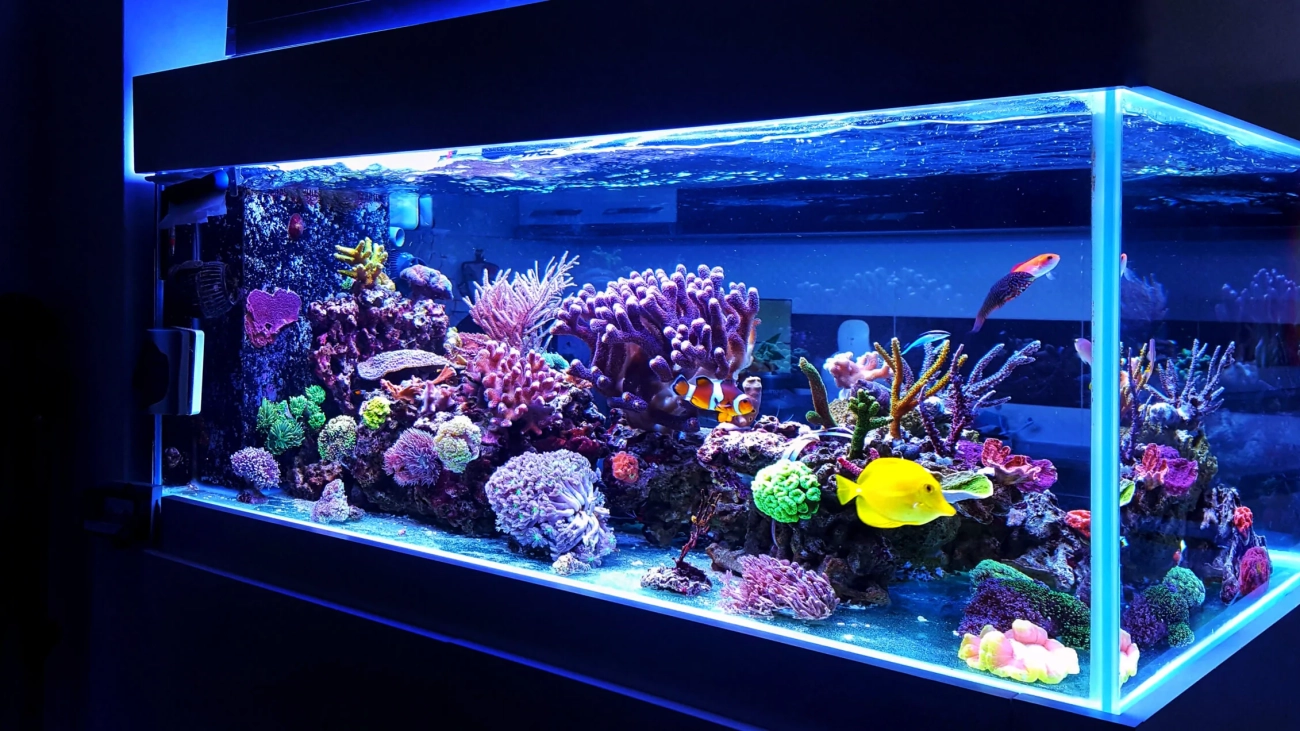
Saltwater aquariums and reef tanks bring the beauty of the ocean into your living or workspace. With colorful marine fish, corals, and live rock, you can create a thriving underwater ecosystem that feels like a natural reef. These setups are more advanced than freshwater aquariums, but with proper planning and care, they can become a stunning centerpiece and a source of relaxation.

For beginners, saltwater tanks can feel overwhelming. Common questions include:

  • What’s the difference between a saltwater tank and a reef tank?
  • How big should my first tank be?
  • What equipment do I really need?
  • Are corals hard to keep alive?

This guide will answer these questions and help you build your first marine aquarium successfully.


🌊 What’s the Difference?

Saltwater Aquariums generally house marine fish, live sand, and sometimes live rock.
Reef Tanks go a step further, adding corals and invertebrates, creating a mini-ecosystem that mimics real reefs.


🎨 Types of Saltwater Setups

1 Fish-Only (FO)

  • Basic saltwater tank with marine fish and decorations.
  • Lower maintenance, great for beginners.

2 FOWLR (Fish-Only with Live Rock)

  • Uses live rock for natural filtration and habitat.
  • More stable environment than FO tanks.

3 Reef Tank

  • Includes fish, corals, and invertebrates.
  • Most visually stunning but requires more care.

4 Nano Reef

  • Compact reef tanks under 100 liters.
  • Stylish but need extra attention to stability.

🛠 Equipment You’ll Need

A successful saltwater or reef tank requires the right gear:

1. Aquarium Tank

At least 100 liters for beginners — larger tanks are more stable.

2. Filtration

Protein skimmer, canister filter, or sump system to keep water clean.

3. Lighting 💡

Corals need reef-safe LED lighting with the right spectrum.

4. Heater & Chiller

Keeps water at a stable tropical temperature (24–26°C).

5. Live Rock & Substrate

Provides natural filtration and a habitat for marine life.

6. Salt Mix & RO/DI Water

Essential for creating clean, safe saltwater.


🪨 Step-by-Step Setup Guide: Saltwater & Reef Tanks

1. Plan Your Tank ✏️

Before buying anything, decide the type of marine aquarium you want:

  • Fish-Only (FO): Colorful marine fish with decorative rock or artificial corals.
  • Fish-Only with Live Rock (FOWLR): Includes live rock for biological filtration and hiding spots.
  • Reef Tank: Complete ecosystem including corals, invertebrates, and reef-safe fish.

Consider your space, budget, and experience level. Reef tanks are the most complex; beginners may start with FOWLR or fish-only setups.

2. Prepare the Tank

  • Clean the Aquarium: Rinse the glass with freshwater—never use soap or chemicals.
  • Add Substrate: Use sand or crushed coral. For reef tanks, live sand introduces beneficial bacteria.
  • Prepare Saltwater:
    • Use RO/DI water for purity.
    • Mix marine salt according to instructions (usually 1 scoop per 10 liters).
    • Stir or use a pump to dissolve fully before adding to the tank.
    • Check Salinity: Ideal salinity is 1.023–1.025 SG (~35 ppt). Use a refractometer or hydrometer for accuracy.
  • Fill the Tank Slowly: Pour water gently over a plate or bowl to avoid disturbing substrate.

3. Add Live Rock & Decorations

  • Live Rock provides essential bacteria and structure.
  • Arrange rocks using the rule of thirds for a natural look.
  • Ensure rocks are stable—never stack in a way that could collapse.

4. Install Equipment

a) Filtration

  • Canister Filter / Hang-On-Back Filter: Removes debris and maintains water clarity.
  • Protein Skimmer: Removes dissolved organic waste before it turns into ammonia/nitrate.
    • Setup: Place on the tank or sump according to instructions.
    • Adjust airflow to produce fine bubbles.
    • Empty the collection cup regularly.

b) Heater

  • Keep water at 24–26°C for most tropical marine fish.
  • Use a reliable thermometer to monitor temperature.

c) Lighting

  • LED or T5 lights are ideal for reef tanks.
  • Soft corals need moderate lighting; SPS corals require high-intensity lighting.
  • Use a timer to maintain 8–10 hours/day.

d) Water Movement

  • Powerheads or wavemakers mimic ocean currents.
  • Gentle flow for soft corals; stronger flow for SPS corals.

5. Cycle the Tank (4–6 weeks)

  • Establish beneficial bacteria that convert ammonia → nitrite → nitrate.
  • Test water parameters: ammonia, nitrite, nitrate, pH, and salinity.
  • Only add fish when ammonia and nitrite reach 0 ppm and nitrate is low.
  • Cycle using live rock, live sand, or a hardy fish as an ammonia source.

6. Add Livestock Slowly

  • Start with hardy fish like clownfish or gobies.
  • Introduce corals gradually.
  • Monitor water parameters and adjust equipment as needed.
  • Quarantine new fish/corals when possible.

✅ Extra Tips

  • Weekly testing of salinity, pH, nitrate, and other parameters.
  • Top-off water with RO/DI to replace evaporation without changing salinity.
  • Patience is key—rushing livestock addition can harm your tank.

🔧 Maintenance Tips

Water Changes: 10–20% weekly with clean saltwater.

Lighting: 8–10 hours/day with a timer.

Test Water: Regularly check salinity, pH, ammonia, nitrite, nitrate.

Feeding: Don’t overfeed — it causes algae growth.


⚡ Common Beginner Mistakes

Adding fish too early before cycling.

Using tap water instead of RO/DI water.

Overstocking fish or corals.

Skipping regular water tests.


🌟 What’s Next?

Saltwater aquariums and reef tanks require patience, but the results are breathtaking. With the right guidance, you can enjoy a thriving marine world at home. At Urban Nature Arts, we’ll be sharing detailed beginner-friendly guides on:

💡 Choosing Your First Marine Fish

🌱 Beginner Corals for Reef Tanks

🌊 Saltwater Aquarium Cycling Explained

✅ Start small, learn step by step, and soon you’ll have your own piece of the ocean.

Join Our Group

how-to-fight-6-types-of-algae-in-your-fish-tank-645222

🪸 Algae Control in Planted Tanks: Keep Your Aquarium Clean and Healthy

Algae is a common challenge in planted aquariums. While a small amount is natural, uncontrolled growth can harm plants and make your tank look messy.

Understanding why algae grows is the first step to controlling it effectively.


🌞 Causes of Algae Growth

  • Excess light or prolonged lighting hours
  • Overfeeding fish, leading to excess nutrients
  • High levels of nitrates and phosphates in water
  • Insufficient plant growth to compete for nutrients

🪴 Prevention Strategies

  • Maintain a proper light schedule: 6–8 hours/day with a timer
  • Feed fish in small portions to avoid leftover food
  • Perform regular water changes (20–30% weekly)
  • Ensure fast-growing plants are present to absorb excess nutrients

🐟 Biological Control

Introduce algae-eating inhabitants:

  • Shrimp: Amano shrimp, Cherry shrimp
  • Snails: Nerite snails, Malaysian Trumpet snails
  • Fish: Otocinclus catfish, Siamese algae eaters

🧽 Manual Removal

  • Scrape algae off glass using an algae scraper
  • Trim leaves affected by algae
  • Remove decaying plant matter promptly

⚙️ Equipment Tips

  • Maintain proper filtration to remove excess nutrients
  • Consider adding CO₂ for faster plant growth, which outcompetes algae
  • Clean pumps, diffusers, and decorations regularly

🌟 Pro Tips

  • Balance light, nutrients, and plant growth to prevent algae naturally
  • Start with hardy, fast-growing plants like Anubias, Java Fern, or Hornwort
  • Observe your tank daily to catch algae early

🌿 What’s Next?

Controlling algae is just one part of maintaining a thriving planted tank. Combine these strategies with proper lighting, substrate, fertilizers, and CO₂ for a lush, healthy aquascape. Check out our detailed guides on each topic for deeper insights:

💡 Planted Tank Lighting: The Complete Beginner’s Guide

🌱 Aquarium Substrates: Which One Should You Choose?

🌬️ CO₂ Systems: A Beginner’s Complete Guide


Join Our WhatsApp Group


gravel_vacuum

🔧 Tank Maintenance: Keep Your Aquarium Healthy and Beautiful

Maintaining your planted tank is just as important as setting it up. Regular care ensures healthy plants, active fish, and a beautiful aquascape.

Many beginners face challenges like:

  • Algae overgrowth
  • Cloudy or smelly water
  • Plants not thriving
  • Fish stress or illness

This guide will show you step-by-step how to maintain a thriving aquarium with minimal hassle.


💧 Water Changes

Regular water changes are crucial. Replace 20–30% of water weekly to remove toxins, excess nutrients, and waste products.

  • Use a siphon to remove debris from substrate.
  • Add dechlorinated water at the same temperature.
  • Check water parameters regularly: pH, ammonia, nitrite, nitrate.

🪴 Plant Care & Trimming

Pruning plants keeps your aquascape tidy, encourages growth, and prevents overcrowding.

  • Trim fast-growing plants weekly.
  • Remove dead or yellowing leaves promptly.
  • Thin out dense growth to allow light to reach all plants.

🧽 Algae Control

Algae is common in aquariums, but can be managed with proper care:

  • Maintain a balanced light schedule (6–8 hours/day).
  • Avoid overfeeding fish.
  • Introduce algae-eating fish, shrimp, or snails.
  • Monitor nutrients; excess leads to algae blooms.

⚙️ Equipment Maintenance

Regularly inspect and clean your aquarium equipment:

  • Rinse filter media in tank water to preserve beneficial bacteria.
  • Check pumps, hoses, and diffusers for blockages.
  • Clean glass and decorations to prevent algae buildup.
  • Replace worn parts before they fail.

🐟 Fish & Invertebrate Care

Observe your fish daily. Healthy fish are active, colorful, and eating well.

  • Quarantine new fish to prevent disease.
  • Remove sick fish promptly.
  • Feed in small portions to avoid overfeeding.

🌟 Pro Tips for Beginners

  • Keep a maintenance log to track water changes, trimming, and testing.
  • Perform weekly checks on all equipment.
  • Observe plants and fish daily to spot issues early.
  • Patience is key — aquascaping improves over time.

🌿 What’s Next?

Regular maintenance ensures a thriving planted tank. Combine this with proper lighting, substrate, fertilizers, and CO₂ for lush, healthy aquascapes. Check out our detailed guides on each topic for deeper insights:

💡 Planted Tank Lighting: The Complete Beginner’s Guide

🌱 Aquarium Substrates: Which One Should You Choose?

🌬️ CO₂ Systems: A Beginner’s Complete Guide


Join Our WhatsApp Group


Honeyview_DSCF1740_1024x1024

🛠 Filtration & Equipment for Planted Tanks: Essential Guide for Beginners

A healthy planted aquarium relies on proper filtration and equipment. Filtration keeps the water clean, oxygen-rich, and free of harmful toxins, while the right tools make maintaining your tank much easier.

Many beginners wonder:

  • Which filter is best for my tank size?
  • Do I need a heater or other equipment?
  • How do I maintain equipment without disturbing plants?

This guide will help you understand the essentials of filtration and equipment for a thriving planted tank.


💧 Importance of Filtration

Filtration removes physical debris, harmful chemicals, and excess nutrients that could trigger algae growth. It also ensures adequate water circulation and oxygenation for both plants and fish.

Signs Your Filtration May Be Insufficient

  • Cloudy water or floating debris.
  • Unstable water parameters (pH, ammonia, nitrites).
  • Algae outbreaks despite proper lighting and nutrients.

🛠 Types of Filters

Several types of filters are available depending on tank size and style:

1. Canister Filters

  • Powerful external filters suitable for medium to large tanks.
  • Allows custom media combinations (mechanical, chemical, biological).
  • Quiet and efficient, but more expensive.

2. Hang-On-Back (HOB) Filters

  • Compact, affordable, and easy to install.
  • Best for small to medium tanks.
  • Simple maintenance but limited media options.

3. Sponge Filters

  • Air-driven, gentle filtration, ideal for shrimp or fry tanks.
  • Provides biological filtration and aeration.

4. Internal Filters

  • Submersible filters inside the tank.
  • Easy to maintain, but can take up space inside the aquarium.

⚙️ Essential Aquarium Equipment

In addition to filtration, a few key tools and equipment ensure a smooth aquascaping experience:

  • Heater: Keeps tropical plants and fish at stable temperatures (24–26°C).
  • Thermometer: Monitors water temperature accurately.
  • Lighting: LED lights designed for planted tanks.
  • Water Test Kits: Check pH, ammonia, nitrite, and nitrate levels regularly.
  • CO₂ System: Optional but boosts plant growth in medium to high-light tanks.
  • Substrate Tools: Tweezers, scissors, and spatulas for planting and maintenance.

💡 Maintenance Tips

  • Clean filter media regularly but avoid washing with tap water; use tank water to preserve beneficial bacteria.
  • Check hoses, pumps, and diffusers for blockages weekly.
  • Replace worn-out parts on schedule to maintain efficiency.
  • Monitor water flow — too strong can uproot plants, too weak can lead to stagnant spots.

🌟 What’s Next?

Filtration and equipment are the backbone of a healthy planted tank. Next, combine this with proper CO₂, fertilizers, and substrate selection for lush, thriving aquascapes. Stay tuned for our detailed guides:

💨 CO₂ Systems: A Beginner’s Complete Guide

🌿 Fertilizers & Nutrients Explained

Join Our WhatsApp Group


H5b62ce7cc9d944d49b97b381ffd6aa914.jpg_q50

💨 CO₂ Systems for Planted Tanks: A Beginner’s Complete Guide

CO₂ is one of the most important elements for planted aquariums. Carbon dioxide is essential for photosynthesis, allowing plants to convert light into energy. Without adequate CO₂, plant growth can slow down, leaves can yellow, and algae may take over.

Many beginners ask:

  • Do I really need a CO₂ system?
  • What types of CO₂ systems exist?
  • How do I dose safely without harming fish?

This guide explains CO₂ basics, system types, and best practices for a thriving planted tank.


💨 Why CO₂ is Important

Plants need carbon dioxide to perform photosynthesis, which fuels their growth. In high-light tanks, the demand for CO₂ increases. Without it, plants may struggle, leading to slow growth and algae outbreaks.

Signs Your Tank May Need CO₂

  • Slow or stunted plant growth despite proper lighting and nutrients.
  • Yellowing or transparent leaves.
  • Algae outbreaks, especially green dust algae or hair algae.

🛠 Types of CO₂ Systems

There are several CO₂ delivery methods for aquariums:

1. Pressurized CO₂ Systems

  • Uses a CO₂ cylinder, regulator, and diffuser.
  • Precise control over CO₂ levels.
  • Best for medium to large tanks or high-light setups.
  • Examples: JBL, Fluval, Dennerle CO₂ kits.

2. DIY CO₂ (Yeast-Based)

  • Simple homemade CO₂ using sugar, yeast, and bottles.
  • Good for small tanks or beginners on a budget.
  • Less stable CO₂ output; requires monitoring and refills.

3. Liquid Carbon Additives

  • No gas injection; CO₂ is provided as a liquid solution.
  • Easy for beginners and nano tanks.
  • Less effective than gas injection for heavy plant growth.
  • Examples: Seachem Flourish Excel, API Leaf Zone.

📏 CO₂ Dosing & Monitoring

Proper CO₂ levels are essential to avoid harming fish while keeping plants healthy:

  • Target CO₂ concentration: 20–30 mg/L for most planted tanks.
  • Monitor with a drop checker or pH controller.
  • Increase CO₂ gradually and observe plant and fish reactions.
  • Turn off CO₂ at night — plants do not photosynthesize in the dark.

💡 Tips for Beginners

  • Start small: Use a low-flow CO₂ diffuser in beginner tanks.
  • Combine CO₂ with proper lighting and nutrients for optimal growth.
  • Regular water changes prevent nutrient buildup and stabilize CO₂ levels.
  • Observe plant health daily — yellowing or melting leaves may indicate imbalance.
  • Always use aquarium-safe CO₂ equipment.

🌟 Recommended Beginner CO₂ Plan

A simple routine for a small to medium planted tank:

Pressurized CO₂ with diffuser: Start at 1 bubble/second and adjust gradually.

Check drop checker daily for color indication.

Maintain lighting at 6–8 hours/day with proper nutrients.


🌟 What’s Next?

Now that you understand CO₂, the next step is combining it with fertilizers and substrates to maximize plant growth. Stay tuned for our detailed guides:

🌿 Fertilizers & Nutrients Explained

🌱 Aquarium Substrates: Which One Should You Choose?

Join Our WhatsApp Group


hqdefault

🌿 Fertilizers & Nutrients: Boost Your Planted Tank Growth

Plants in a planted aquarium rely on more than just substrate and light — they also need a steady supply of nutrients and fertilizers to thrive. Proper fertilization helps your plants grow lush, vibrant, and healthy, while preventing algae problems caused by nutrient imbalance.

Beginners often ask:

  • Which nutrients do my plants actually need?
  • Liquid or root fertilizers — which should I use?
  • How often should I dose the tank?
  • Can I overdose and harm fish or plants?

This guide will cover macronutrients, micronutrients, dosing methods, and practical tips to keep your planted tank thriving.


🌿 Essential Plant Nutrients

Plants need two types of nutrients for healthy growth:

1. Macronutrients

  • Nitrogen (N) – promotes leaf and stem growth. Deficiency causes yellowing leaves.
  • Phosphorus (P) – essential for root development and energy transfer. Deficiency leads to stunted growth.
  • Potassium (K) – helps overall plant health and strengthens cell walls. Deficiency causes pinholes in leaves.

2. Micronutrients

  • Iron (Fe) – critical for photosynthesis and leaf coloration. Deficiency results in yellow leaves with green veins.
  • Magnesium (Mg) – important for chlorophyll production.
  • Calcium (Ca) – supports cell structure and plant strength.
  • Trace elements: Zinc (Zn), Manganese (Mn), Boron (B), Copper (Cu), Molybdenum (Mo) – needed in tiny amounts for healthy growth.

💧 Types of Fertilizers

Choosing the right fertilizer depends on your plants, substrate, and setup:

1. Liquid Fertilizers

  • Easy to dose directly into water column.
  • Good for fast-growing plants.
  • Often contains NPK and trace elements.
  • Examples: Seachem Flourish, Tropica Plant Growth.

2. Root Tabs / Tablets

  • Placed directly into substrate near plant roots.
  • Best for heavy root feeders like Amazon Swords, Cryptocoryne, and Echinodorus.
  • Slow-release, long-lasting nutrient source.

3. All-in-One Fertilizers

  • Contain both macro and micronutrients.
  • Good choice for beginners or small tanks.
  • Reduces risk of nutrient imbalance.

🛠 Dosing & Application

Proper dosing is key to avoid algae blooms and nutrient deficiencies:

  1. Follow manufacturer instructions: Start with recommended doses.
  2. Adjust based on plant growth: Increase slowly if plants show slow growth, decrease if algae appears.
  3. Regular schedule: Dose liquid fertilizers 2–3 times per week for consistent nutrients.
  4. Root tabs: Replace every 2–3 months as nutrients deplete.
  5. Observe plants: Yellowing, holes, or stunted growth indicates deficiency.

💡 Tips for Healthy Plant Growth

  • Balance light, CO₂, and nutrients — one without the other can cause issues.
  • Do small weekly water changes (20–30%) to prevent nutrient buildup.
  • For beginners, start with low-dose fertilizers and increase gradually.
  • Mix liquid and root fertilizers for optimal results.
  • Always use aquarium-safe products to protect fish and invertebrates.

🌟 Recommended Beginner Fertilizer Plan

A simple, safe routine for beginners:

Liquid Fertilizer: 2–3 times per week (low dose)

Root Tabs: Every 2–3 months for heavy root feeders

Water Changes: Weekly 20–30% to maintain balance


🌟 What’s Next?

Now that you understand fertilizers, the next step is understanding CO₂ and how it interacts with nutrients to boost plant growth. Stay tuned for:

🌬️ Do You Really Need CO₂? A Beginner’s Guide

Join Our WhatsApp Group


img_0497

🌱 Aquarium Substrates & Soil: The Ultimate Beginner’s Guide

The foundation of a healthy planted tank starts with the right substrate. Choosing the proper substrate ensures plants have the nutrients they need and helps maintain water stability.

Beginners often ask:

  • Which substrate type is best for beginners?
  • Do I need nutrient-rich soil, or is sand enough?
  • How do I create slopes or layers for depth?
  • Can I mix substrates for different plant types?

This guide will cover the types of substrates, layering techniques, and tips for keeping your plants healthy from day one.


🌱 Types of Aquarium Substrate

There are several substrate options for planted tanks. Understanding their characteristics will help you choose the right one:

1. Nutrient-Rich Planted Tank Soil

  • Provides essential macronutrients (N, P, K) and micronutrients (Fe, Mg).
  • Supports strong root growth for heavy-rooted plants like Amazon Swords.
  • Examples: ADA Aqua Soil, Tropica Plant Soil.

2. Inert Substrates (Sand, Gravel)

  • Do not contain nutrients, so plants need root tabs or liquid fertilizers.
  • Easy to clean and maintain.
  • Good for tanks with minimal plants or fish-focused setups.

3. Layered Substrates

  • Combine nutrient-rich soil at the bottom with sand or gravel on top for aesthetics.
  • Helps prevent clouding water and provides long-term nutrients.

🛠 How to Prepare Substrate

Follow these steps for a stable planted tank substrate:

  1. Plan your layout: Decide where tall plants, midground plants, and carpets will go.
  2. Clean the substrate: Rinse sand or gravel to remove dust.
  3. Layer the substrate: Start with nutrient-rich soil, then add sand/gravel if desired.
  4. Create slopes: Sloping substrate adds depth and perspective to your aquascape.
  5. Level gently: Use a spatula or hand to smooth areas where needed.

💡 Tips for Healthy Plant Growth

  • Use root tabs for heavy root feeders if using inert substrates.
  • Mix small amounts of sand or fine gravel on top for natural look.
  • Do not bury plant rhizomes; this can kill plants like Anubias and Java Fern.
  • Consider substrate depth: 3–5 cm for small plants, 5–7 cm for deep-rooted plants.
  • Regularly vacuum only the top layer to avoid disturbing roots.

🌟 What’s Next?

Now that you know how to choose and set up the perfect substrate, the next step is ensuring your plants get proper lighting. Check out our upcoming guide:

💡 Planted Tank Lighting: The Complete Beginner’s Guide

Join Our WhatsApp Group